Setting up Tubeless Tyres: Step-by-Step Instructions for Success
Gavin Richardson - October 03 2023
Tubeless tyres have revolutionised the world of cycling, offering numerous advantages over traditional inner-tube setups.
From enhanced performance and improved puncture resistance to better traction and a smoother ride, tubeless tyres have become increasingly popular among cyclists of all disciplines. If you are not riding a tubeless set up yet, then you are definitely missing out.
In this blog post, we will delve into the benefits of tubeless tyres, guide you through the setup process, and shed light on living with tubeless so you can continue to reap the benefits.
| Pros |
|---|
| Reduces the risk of puncture |
| Self sealing |
| Lower Rolling resistance |
| Increased grip |
| Cons |
|---|
| If you get a decent size puncture you will need to either plug it or put a tube in |
| Tyres are more difficult to install |
| Lower pressure can lead to pinch punctures |
| Can be messy to set up |
What are the Benefits of Tubeless Tyres?
Reduced Puncture Risk: One of the primary advantages of tubeless tyres is their resistance to punctures. By eliminating the inner tube, which is often susceptible to pinch flats and thorn punctures, tubeless tires significantly reduce the risk of flats during your rides.
I have ridden to work down canal paths and through fields and never once had a puncture from a thorn or anything. I probably have had a puncture but never noticed due to it being sealed and so never actually going down.
Improved Traction: Tubeless tyres can be run at lower pressures than their tubed counterparts, allowing for a larger contact patch with the ground. This increased contact patch enhances grip and traction, especially in off-road or wet conditions, giving you more confidence while navigating smashing those trails.
Enhanced Performance: With lower rolling resistance, tubeless tyres offer better performance on the road and the trail. The absence of friction between the tube and tyre allows for a smoother ride, resulting in faster speeds and improved overall efficiency.
Comfortable Ride: Running tubeless tyres at lower pressures not only boosts traction but also provides a more comfortable and forgiving ride. The tyres can absorb small bumps and vibrations, reducing fatigue during longer rides.
Sealing Capability: Tubeless tyres are equipped with a sealant that can quickly seal small punctures, preventing air from escaping and maintaining tyre pressure during your ride. This feature is especially advantageous when riding in remote areas, where immediate repair may not be possible.
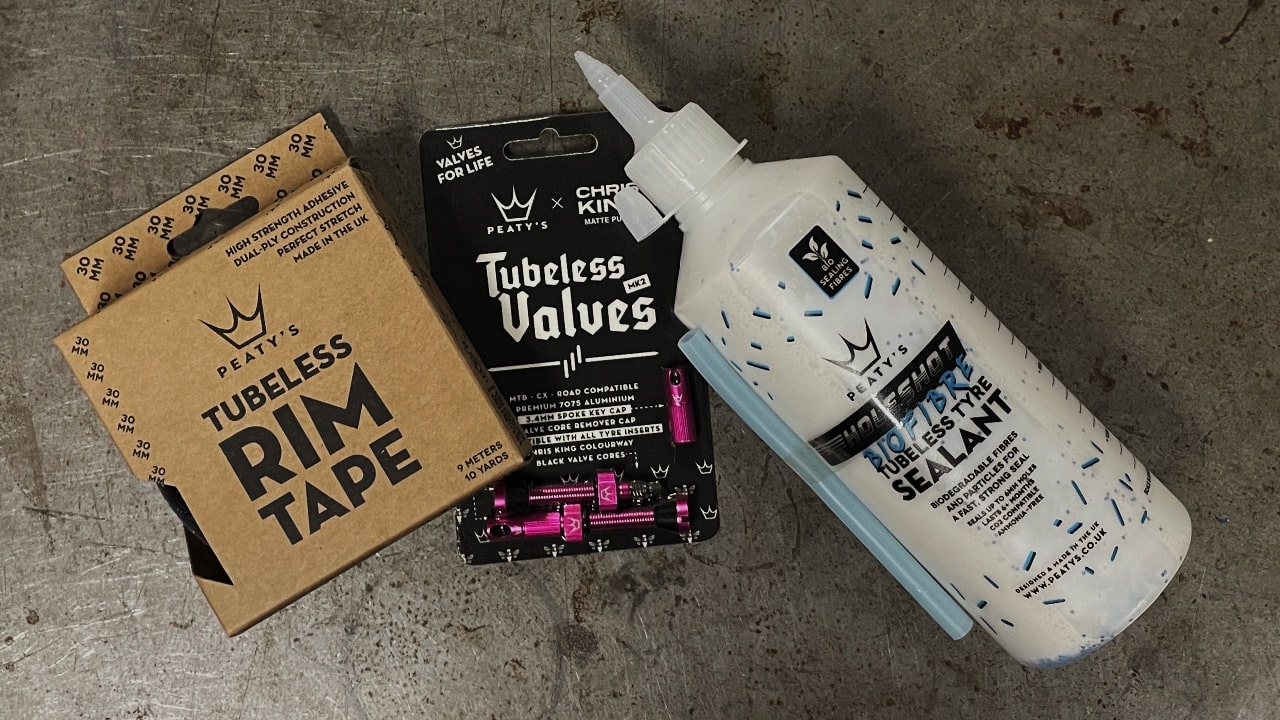
Everything you need to set up tubeless tyres, minus a compressor which is optional.
What You’ll Need
Before diving into the tubeless setup, make sure you have the following essential tools and materials:
Tubeless-ready Tyres: Sounds daft doesnt it? Please make sure you have tubeless-ready tyres designed to be set up without inner tubes. These tyres have a specially designed bead that creates an airtight seal against the rim. otherwise you'll have sealant leaking like Colleen Rooneys texts.
Tubeless-ready Rims: If your rims are not tubeless-ready, you will need to convert them using a tubeless rim tape and valve kit.
Tubeless Rim Tape: This airtight tape is applied to the rim bed to create a seal between the tyre and the rim. Use tape specifically designed for your rim's width. Please dont use Gorrilla tape or duck tape as this makes it very difficult to re tape, should your tape need removing to replace a spoke etc. Your bike shop will thank you later.
Tubeless Valves: Tubeless valves feature a rubber gasket or O-ring that helps maintain an airtight seal. Ensure you have the correct valve length for your rim's depth.
Sealant: Tubeless sealant is crucial for puncture prevention and repair. There are various sealant options available, but latex-based ones are common due to their effectiveness.
Floor Pump or Compressor: A floor pump with a large volume and high-pressure capability or a compressor is optional to seat the tyre onto the rim with a burst of air. It can be done with a standard track pump but a compressor makes the job easier.
Tubeless Tyre Setup Step By Step
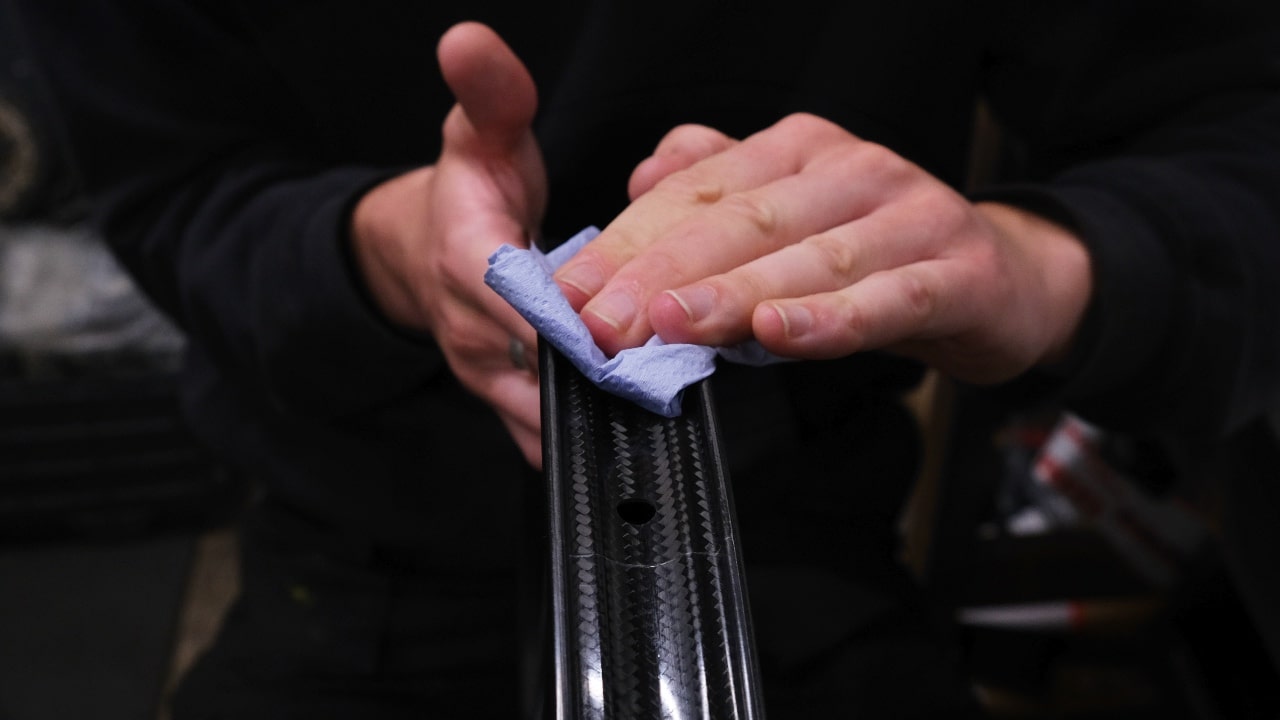
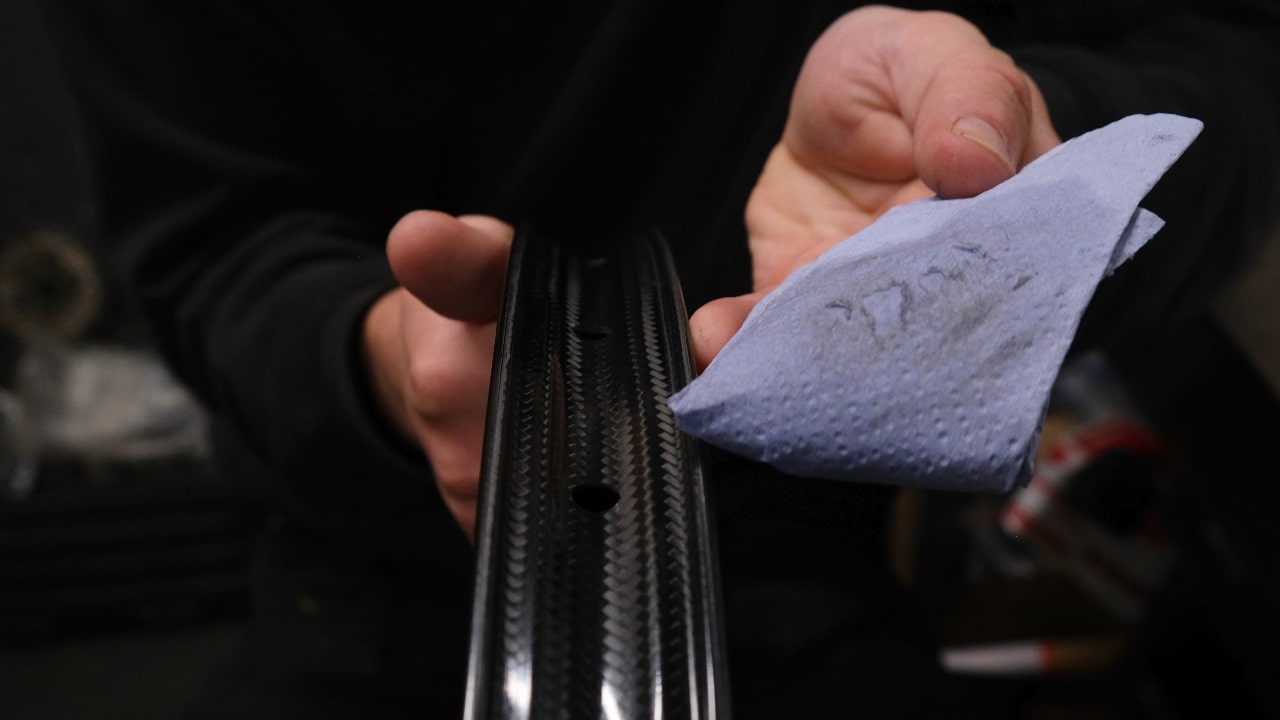
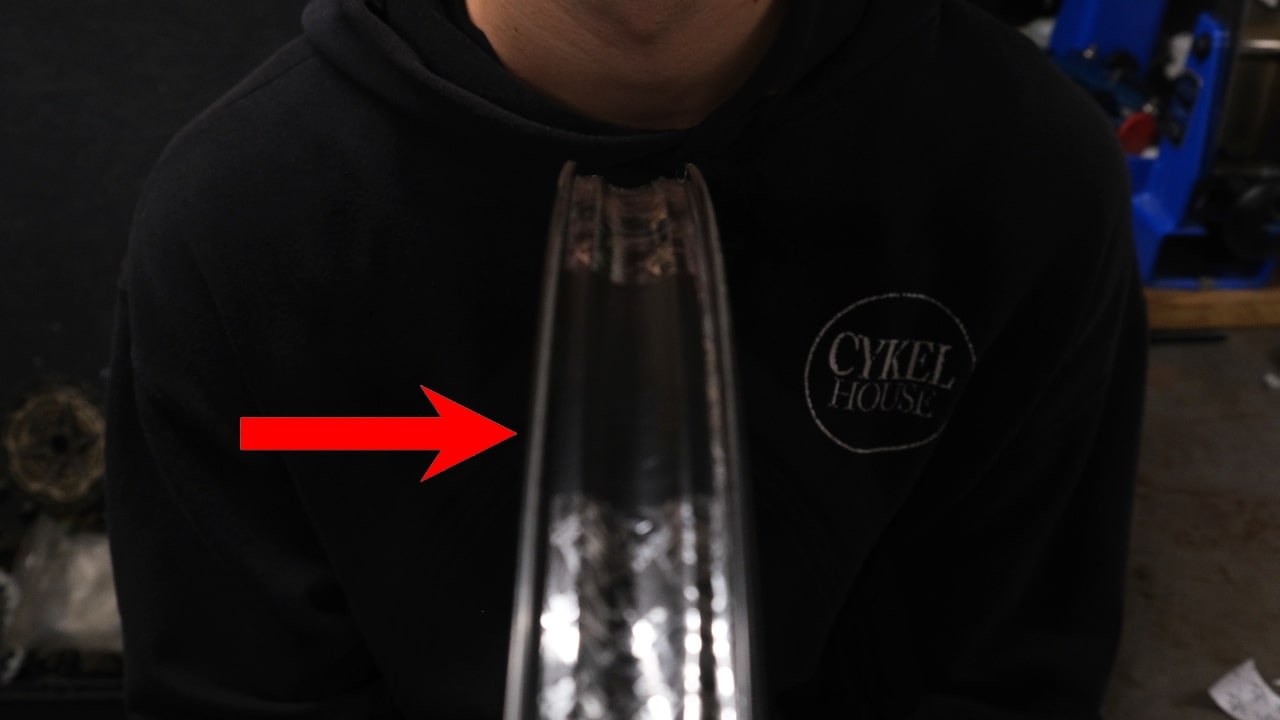
Make sure you clean the rim before taping it. This was a brand new rim and as you can see the cloth was filthy
1. Tape the Rim
Clean the rim thoroughly to remove any dirt or residue.
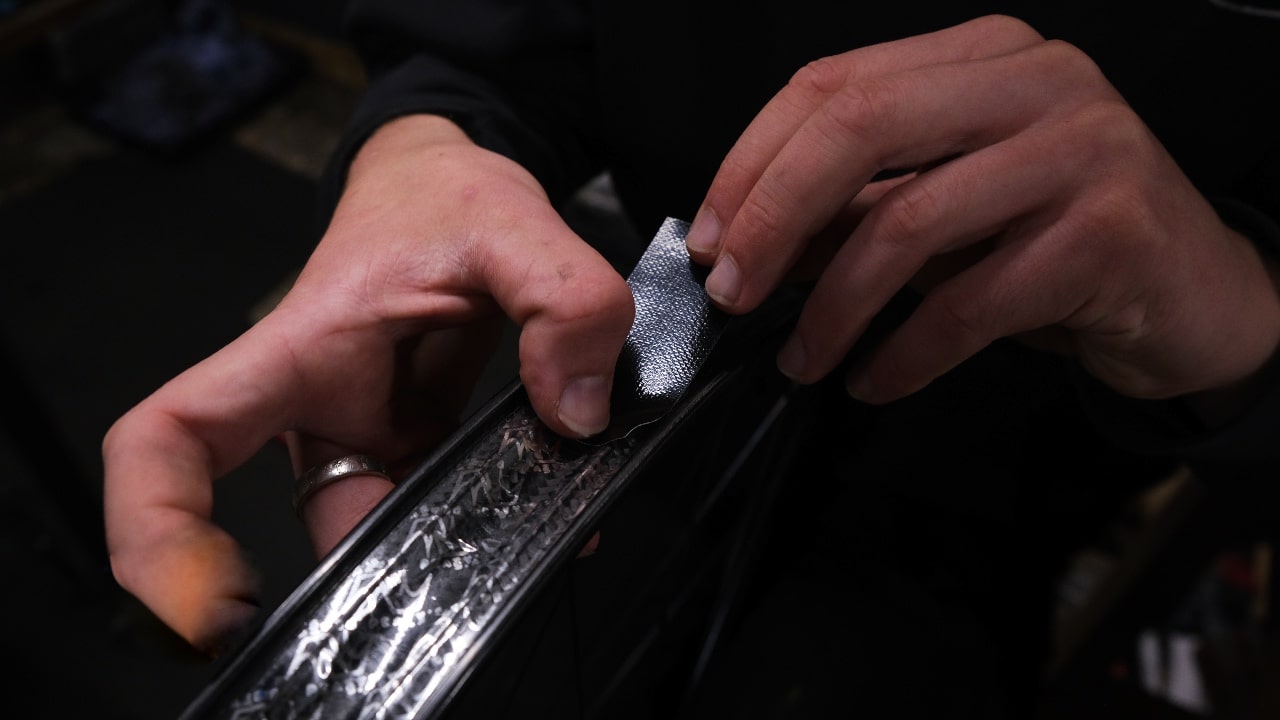
Start applying the tubeless rim tape by securing one end almost a quater of the rim before the valve hole. Slowly wrap the tape around the rim. Continue all the way around past where you started and a quarter of the way past the valve hole.
Once you complete the wrapping process, press the tape firmly into place to ensure a proper seal. Check all the edges are securely in place.
Peatys Rim Tape also comes with a handy small strip of gaffer tape to seal down the end of the tape. As often this can lift over time and cause sealant to penetrate under the tape.

As you wrap the tape around the rim follow with your thumb pushing the tape into the well of the rim
Peatys small strip of gaffer tape ensuring the tape doesnt lift
2. Put the Valve in Place
Put a small slit into the tape where the valve hole is. Insert the tubeless valve through the valve hole, and hand-tighten the locknut from the inside of the rim to secure it in place. The rubber gasket on the valve should create a tight seal against the rim.
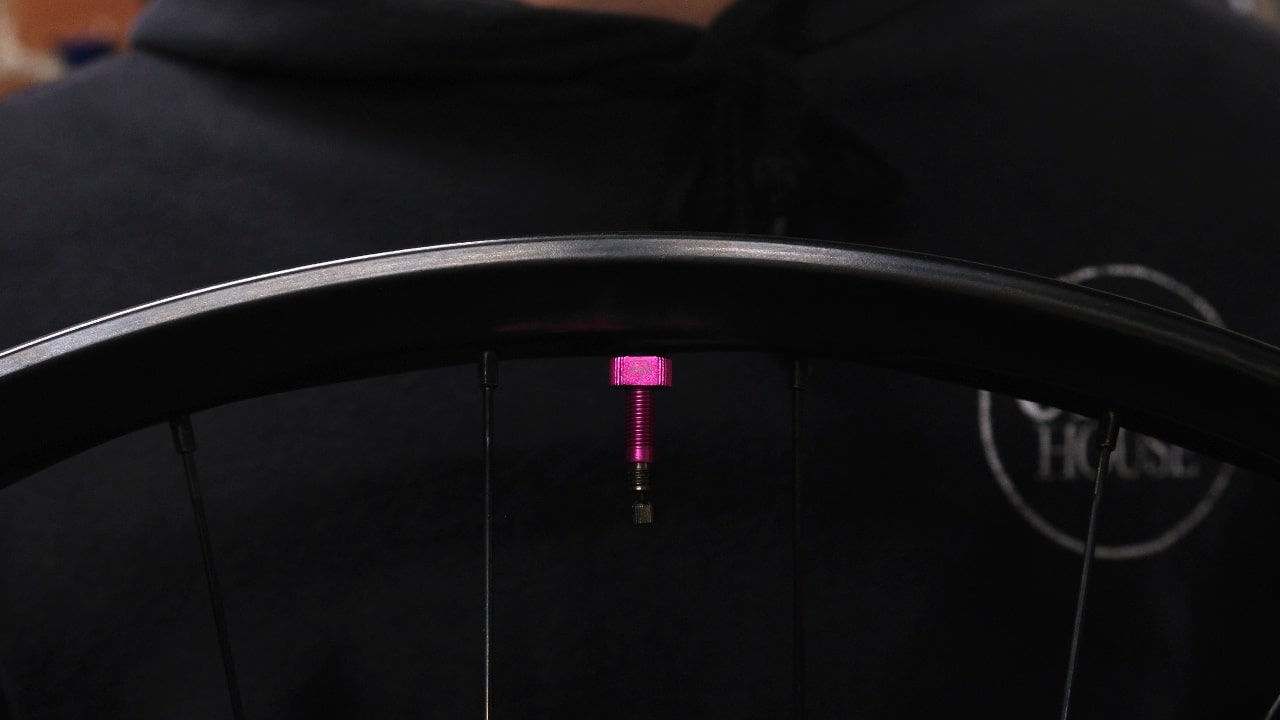
Pop the tubeless valve into place. DO NOT overtighten, it doesnt create a better seal it just destroys your valve or worse, rim.
3. Put the Tire On
Mount one bead of the tubeless tyre onto the rim, starting opposite the valve. Use your hands to work the tyre onto the rim, ensuring it sits evenly on both sides. Avoid using tire levers, as they can damage the tire or rim tape stopping it from sealing.
Pro Tip - Ensure the bead of the tyre is sat in the well of the rim and not against the wall. This makes it easier to get the last bit of the tyre on the rim.
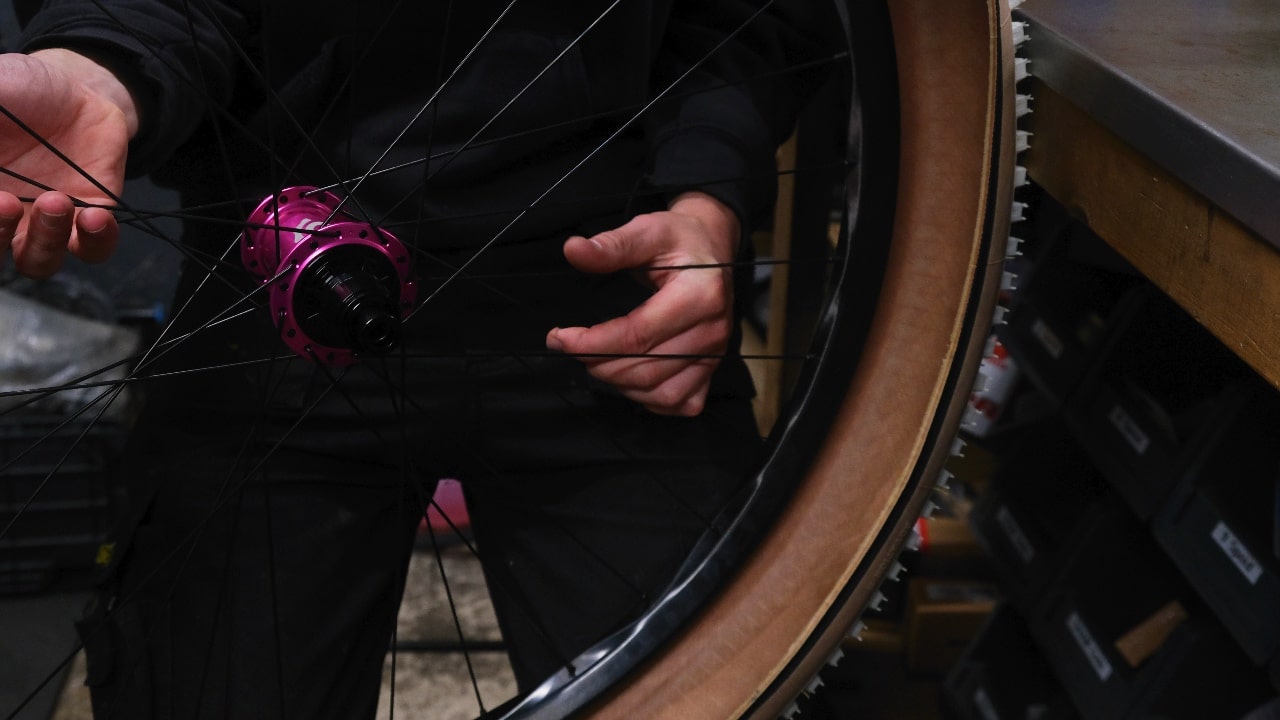

Get one side on first and then work on the other
4. Inflate the Tire
Using a floor pump or compressor, start inflating the tyre. Keep a close eye on the bead as it seats onto the rim.
If the tyre is not seating evenly, you may need to add briefly remove the valve core to allow a higher volume of air to enter quickly, helping the tyre pop into place.
Peatys tubeless valves include a valve core remover and spoke key integrated into the valve cap.

Valve core remover built into the peatys tubeless valve cap
5. Add Sealant
Once the tyre is seated correctly let the air back out of the tyre, inject the recommended amount of tubeless sealant through the valve using a syringe or the sealant's specific applicator as seen on Peatys Holeshot Sealant. Shake the wheel to distribute the sealant evenly inside the tyre. Then, reinstall the valve core and continue to inflate the tyre to the recommended pressure.
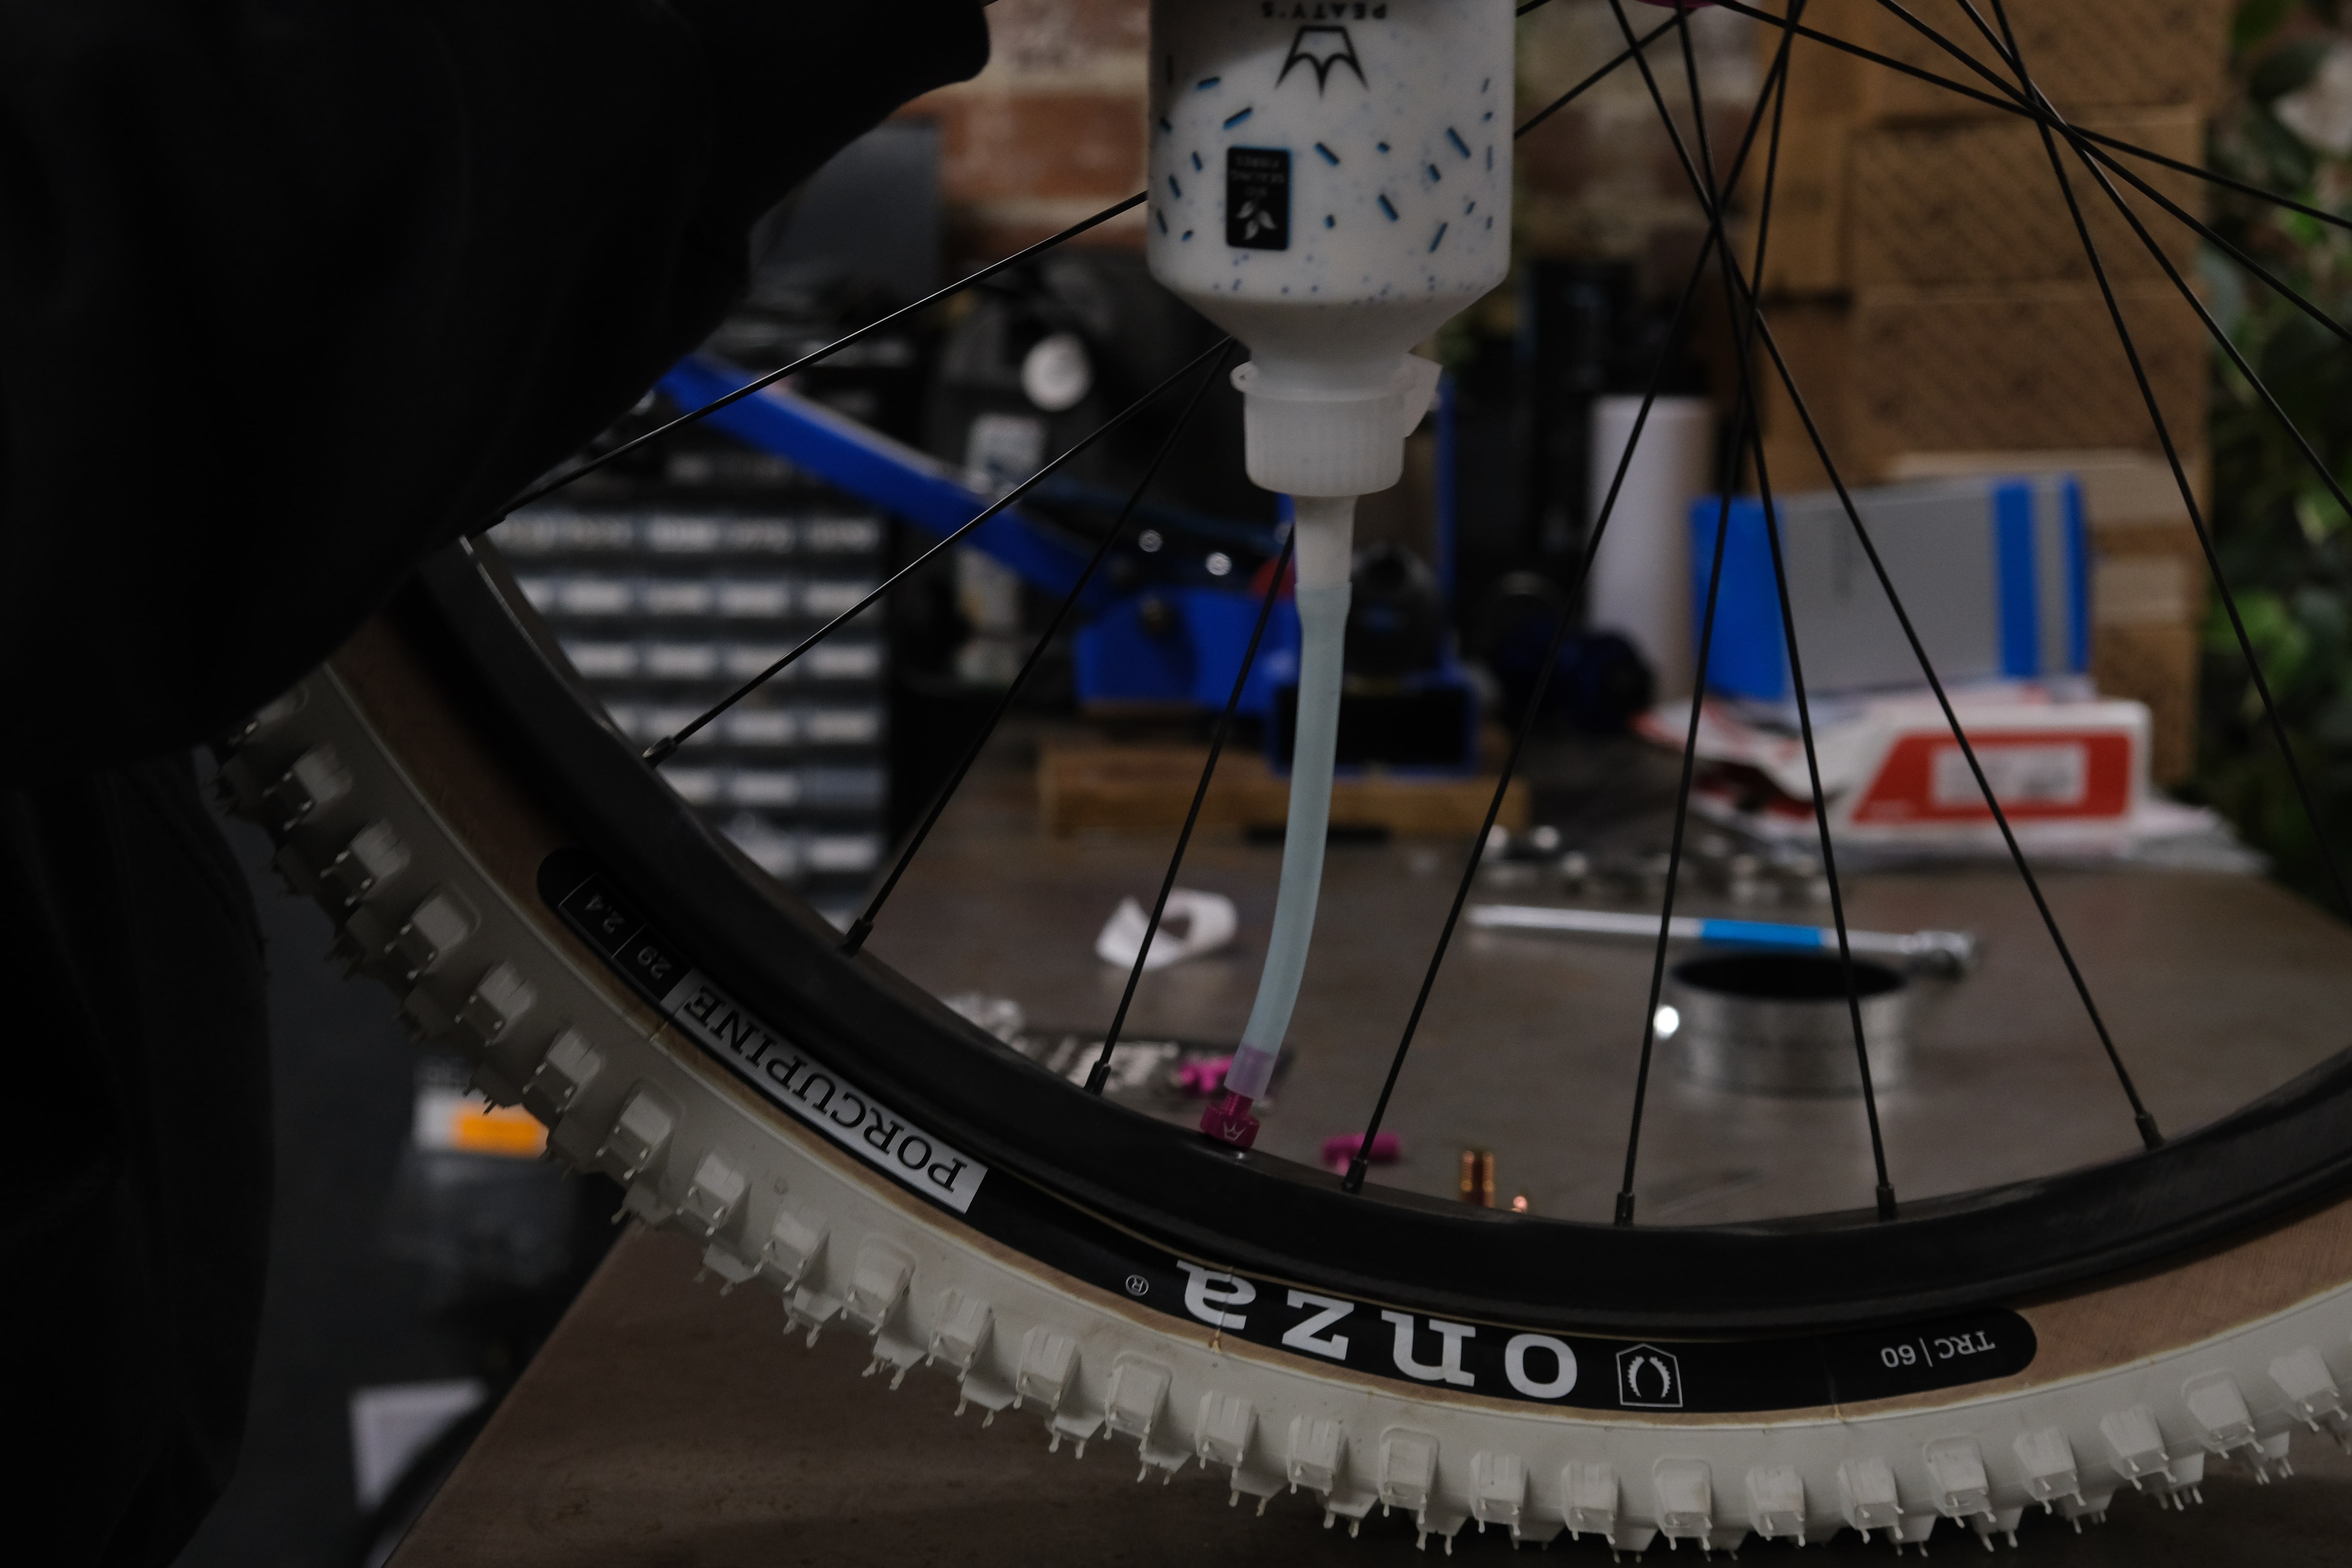
Peatys sealant features a tube that can be directly attached to the valve for easy insertion
Congratulations, you now have a perfectly set-up tubeless tyre! Easy wasnt it.
Living with Tubeless
Living with tubeless tyres opens up a world of possibilities for cyclists, whether you're a mountain biker seeking rugged trails or a road cyclist looking for a smoother, more efficient ride. Let's delve further into the nuances of living with tubeless tyres and some additional tips to maximize their benefits.
Tire Maintenance and Inspections:
While tubeless tyres are more resilient to punctures, regular maintenance and inspections are still crucial. Before every ride, check your tyres for any debris or cuts that may compromise their integrity. If you notice any significant damage or loss of sealant, address it promptly to prevent future issues.
Sealing Larger Punctures and Cuts:
Although tubeless sealant is effective in sealing smaller punctures, larger cuts or gashes may require more attention. In such cases, use a tyre plug kit or even a spare inner tube to get you back on the trail or road. Once you've completed your ride, replace the tyre or consider using a patch on the inside if the damage is repairable.
Tyre Pressure Adjustment:
Experiment with different tyre pressures to find what works best for your riding style and the terrain you frequent. Lower pressures offer improved traction and comfort, but they may also increase the risk of burping air from the tyre in aggressive cornering or rough terrain. On the other hand, higher pressures reduce the risk of burping but may compromise grip and comfort. Strike a balance based on your preferences and riding conditions.
Seasonal Sealant Refresh:
Over time, tubeless sealant can dry out or become less effective. To maintain its puncture-sealing properties, consider refreshing the sealant every few months or according to the manufacturer's recommendations. Removing the tyre, cleaning out any dried sealant, and replenishing with fresh sealant will keep your tubeless system running smoothly.
Emergency Tyre Repair:
Carry a small kit with essential tools and supplies for emergency tyre repairs during your rides. Include items such as a tubeless plug kit, tyre levers, a mini pump or CO2 inflator, and a spare tube. In case the sealant fails to seal a puncture, you can use these tools to get you back on the road or trail and sort out the tubeless setup later.
Proper Storage:
If you plan to store your bike for an extended period, store it with the tyres at their maximum recommended pressure. This prevents the tyres from developing flat spots and helps maintain the effectiveness of the sealant.
Still unsure how to do it? check out these handy videos from Peatys Products
How to tape your rim
Fitting your valve
Adding sealant
Embracing tubeless tyres is a game-changer for cyclists seeking improved performance, puncture resistance, and a more enjoyable riding experience. Setting up tubeless tyres may require some initial effort and attention to detail, but the benefits far outweigh the investment. From better traction and comfort to reduced puncture risk and enhanced efficiency, tubeless tyres have become a staple for cyclists of all levels.
By following the step-by-step guide to set up your tubeless tyres and implementing the tips for living with tubeless, you can make the most out of this revolutionary technology. Enjoy the freedom of exploring challenging terrains without worrying about flats, and relish the smooth, fast-paced rides on the road. Remember to maintain your tubeless setup regularly, and carry essential repair tools during your rides to tackle any unforeseen situations.
Tubeless tyres are not just a trend; they represent a significant advancement in cycling technology. So, equip your bike with tubeless tyres and elevate your cycling experience to new heights. Embrace the simplicity and performance of tubeless, and you'll never look back.
Shred on!
MEET THE AUTHOR
GAVIN RICHARDSON
Some say Gavin invented the wheel. They are lying of course, but he does build a mean set.
Chief of Cykel House, aging rider and father of 3. Gavin has been riding the majority of his life in multiple different forms. He created Cykel House out of passion and enthusiasm for the sport which cannot be matched.
Always on the hunt for the best products and latest trends his finger is right on the pulse.
Interesting fact - Gavin won a handwriting competition at age 7. What a legend.
Likes - A well built berm, beer and raw sprouts
Dislikes - Stainburn woods, headset cable routing and lycra


Comments